• Home
  • Shop
  • About
  • Updates
  • Contact
  • Home
  • Shop
  • About
  • Updates
  • Contact
Search by typing & pressing enter

YOUR CART

Picture

Welcome to the Ladysmith Primary Fine Arts page.
 This site will have ideas posted each week, by Miss Murray that you can work on at home.

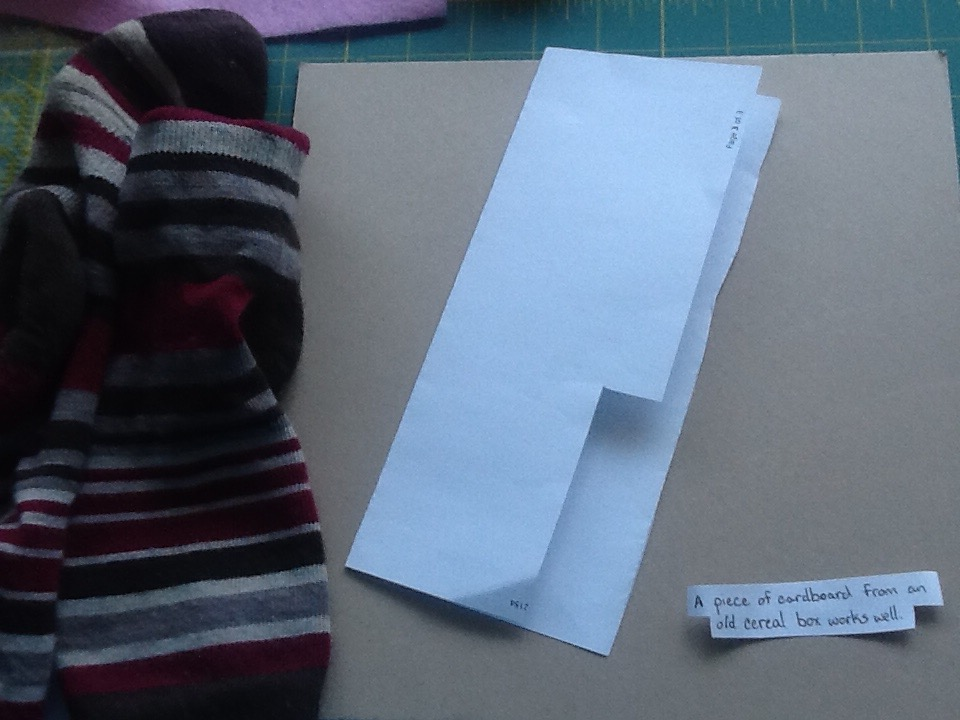
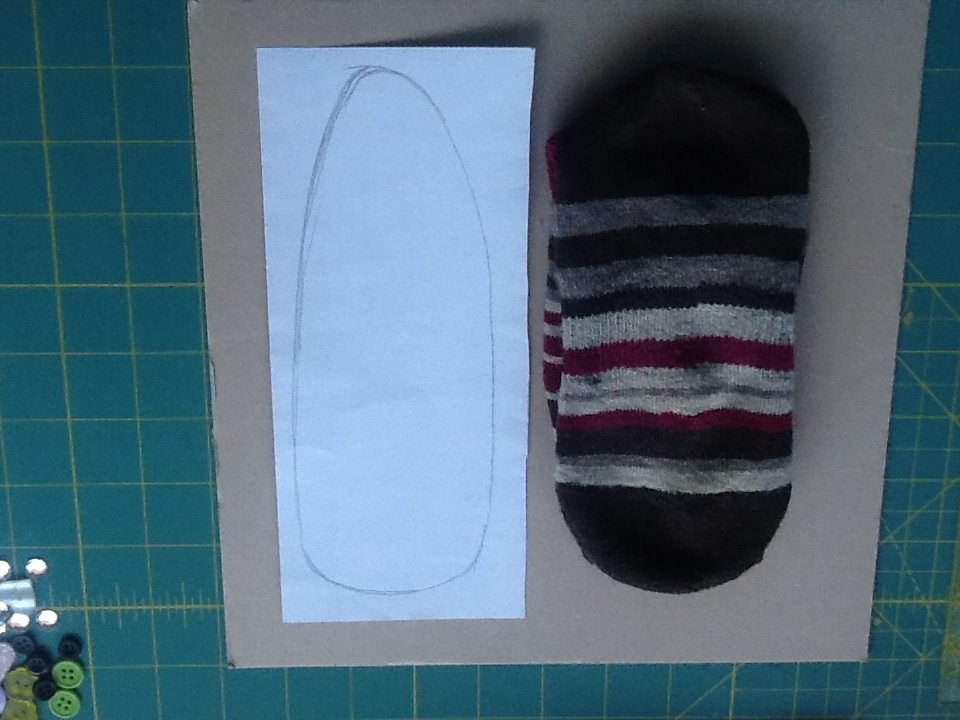
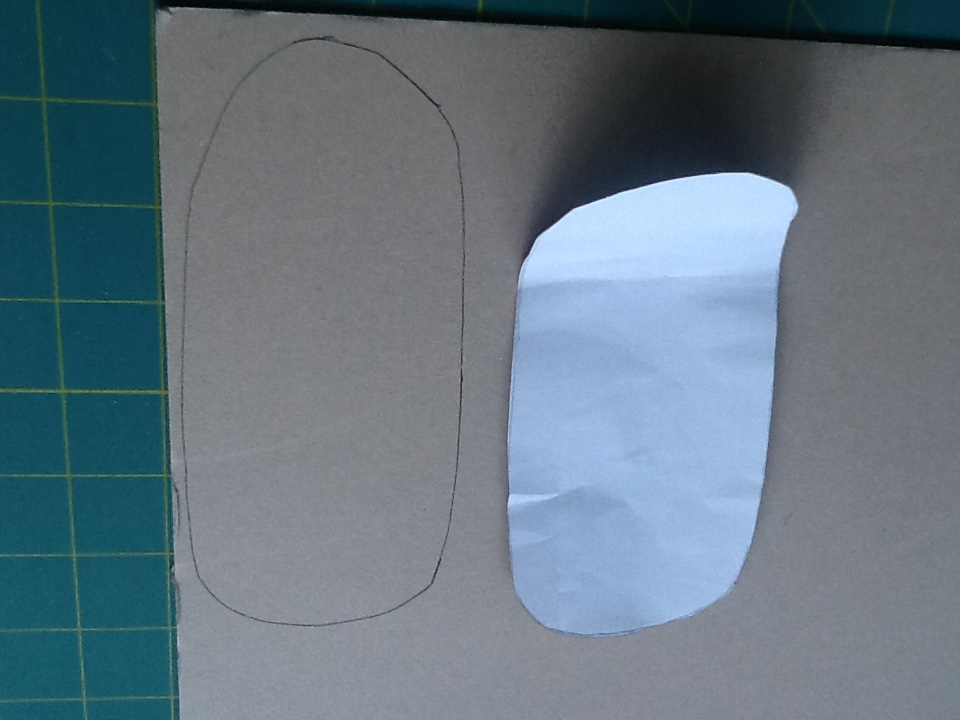
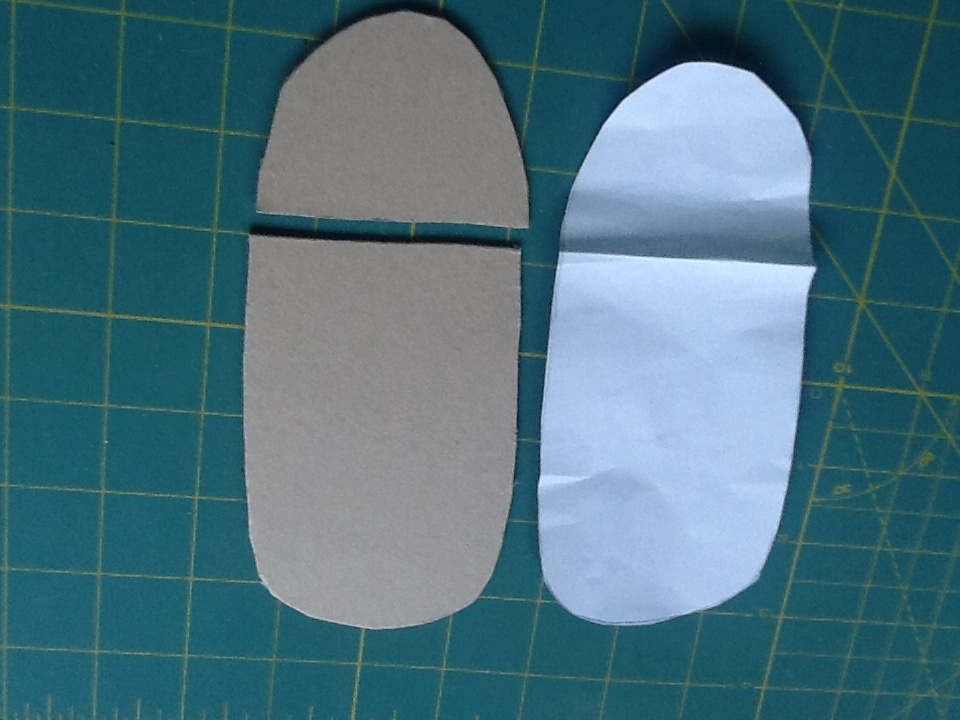
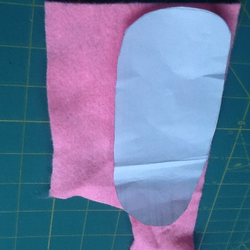
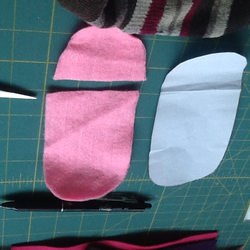
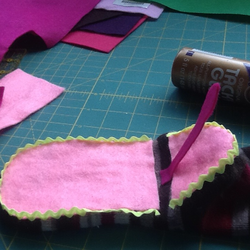
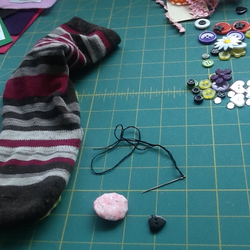
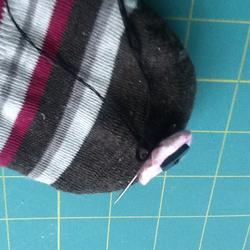
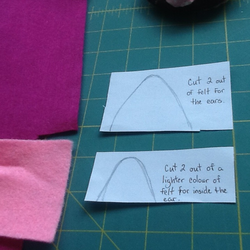
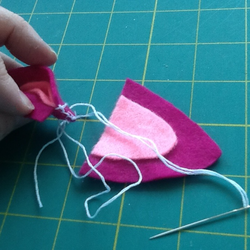
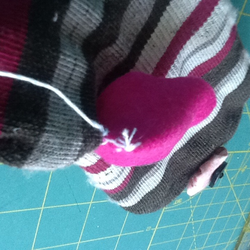
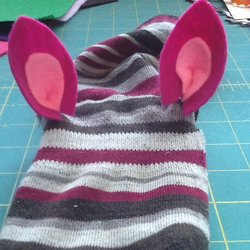
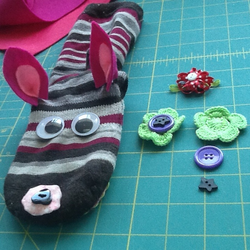
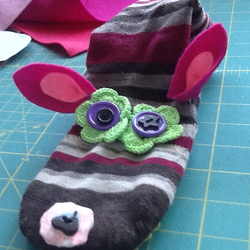
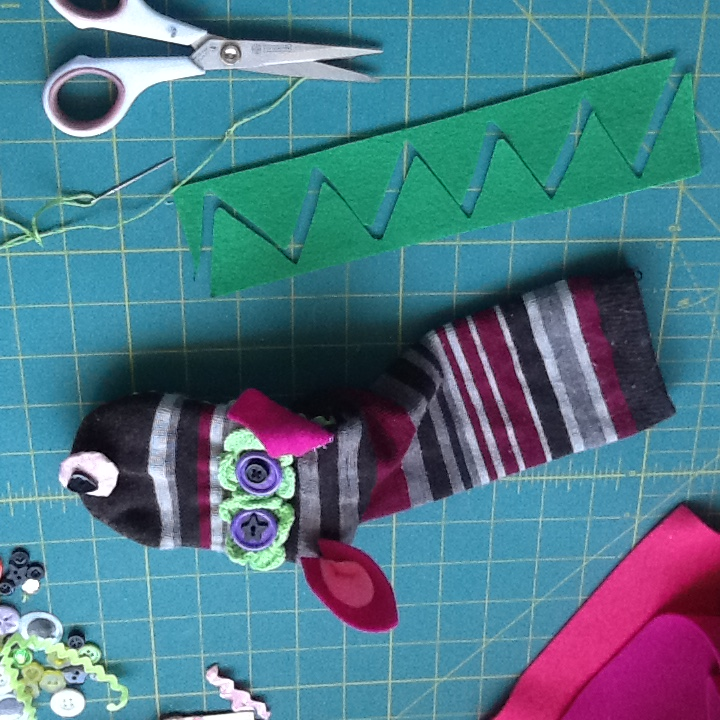
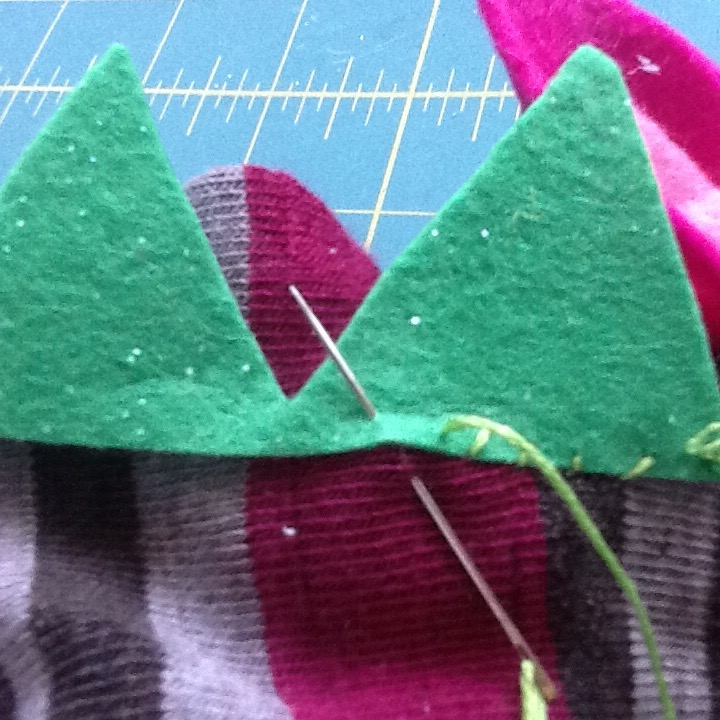
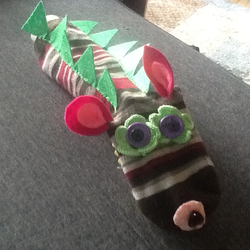
                                                  Lets make a Sock Puppet.      


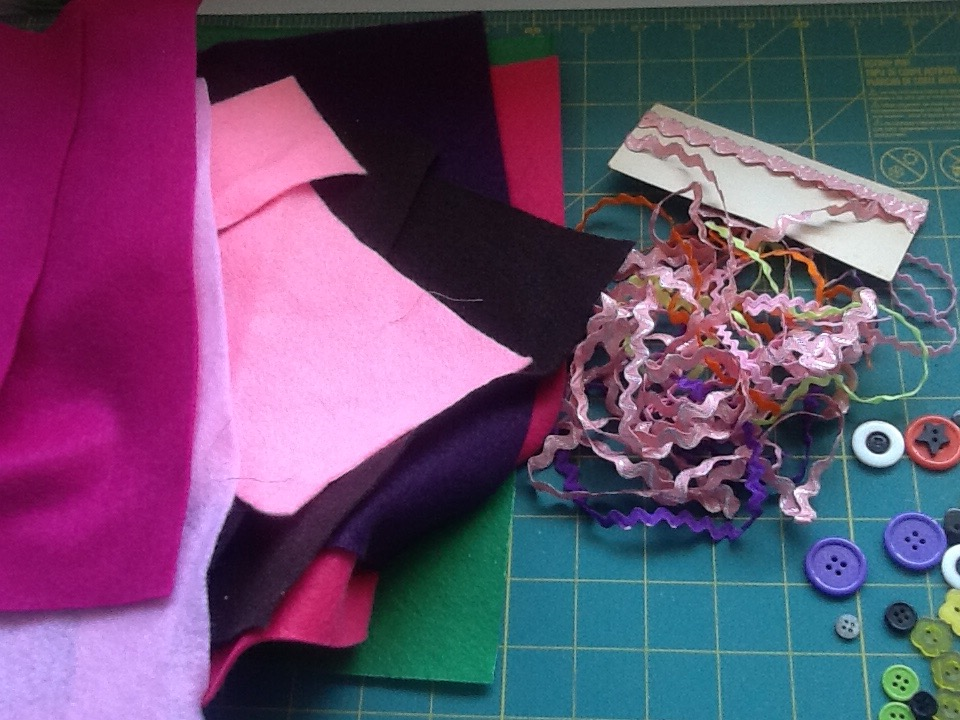
     Have you been helping with the laundry this week? Have you found socks that have lost their partner, or they're social distancing? Well I have an idea we can try with some of those left over single socks. Ask your parents nicely, if you can make a sock puppet with one of them.
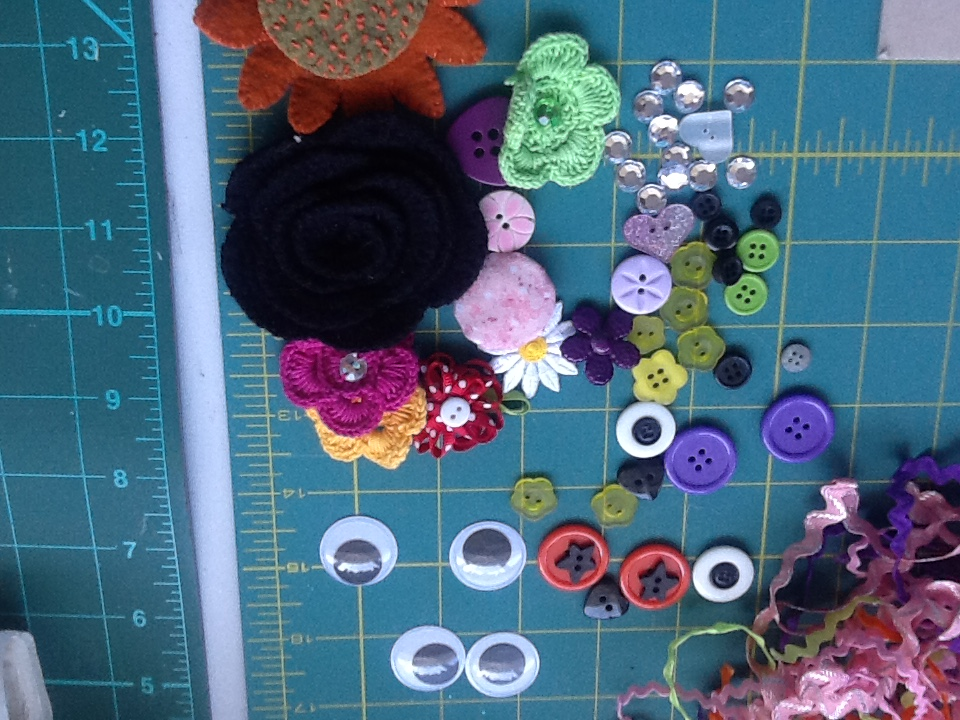
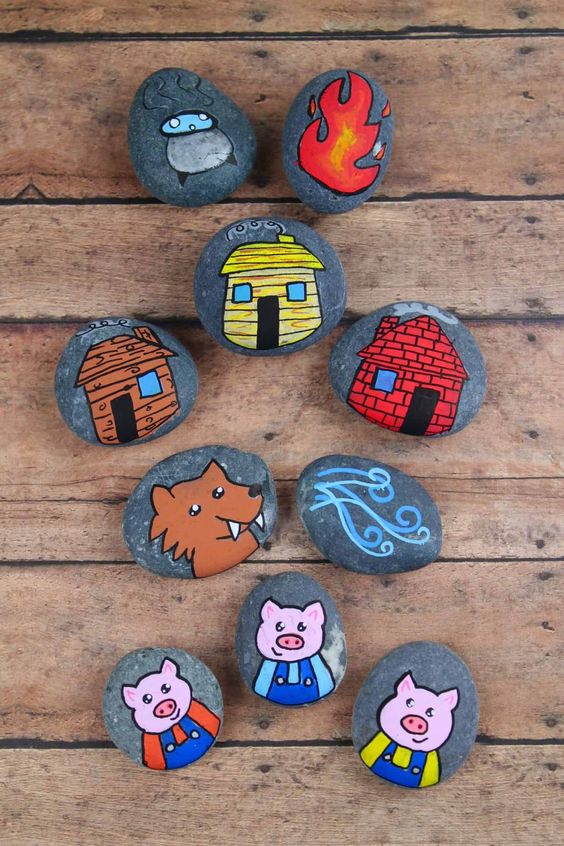
      Sock puppets are a wonderful way to show your creativity and to use your imagination. You can make a sock puppet into anything you choose. Maybe you want to make your puppet into a person, someone you know, or a new friend! You may decide to create an animal puppet, like your Spirit animal or your favorite pet. I hope some of you will try making Fairy Tale characters like Red Riding Hood, Goldilocks or the Big Bad Wolf. Once you have created your Puppet you can use them to re-create Fairy Tales like we did in class with   Readers Theatre.  You can act out your Fairy Tale or story for your family, and if you are keeping a journal, draw a picture of your puppet and tell me about it! What is your puppets name? What story or Fairy Tale did it help you re-create? Did you bring in other puppets and stuffies to help you? Well lets get started.
First you will need a few materials to create your one of a kind new friend.....​
Picture
 Some bits of felt, fancy ribbon or rick-rack, various buttons in different sizes.
Picture
Some card board (from an old cereal box will work) some scrap paper, and of course a sock.
Picture
 Scissors, a pencil. pen and some tacky glue.
Picture
I had some googly eyes, but you can use different size buttons instead.
Picture
Step 1: on the scrap of paper I drew an oval the size of my sock foot. This will be used as a template to cut out the inside of the mouth and the cardboard.
Picture
 Step 2: cut out the paper oval and trace around it onto the card board, then cut the card board oval out.
Picture
 Once you have cut both out, then three quarters of the way down the card board cut through, so you have 2 pieces. Now put the pieces of cardboard inside the sock to give it stability. You may find you only need one piece or you may not like to use them at all, its up to you.
Picture
Step 3: take the paper template and trace the oval onto a piece of felt.
​This will be the inside of your puppets mouth
.

Picture
Cut the felt at the same size as the card board.

Picture
Step 4: Now glue those pieces onto your sock, for the top and bottom of your puppets mouth.

Picture
Step 5: Once you have  glued your mouth on you can decorate with  felt or rick-rack to make it look like it has teeth.

Picture
Don't forget to give your new friend a tongue!

Picture
Step 6: Now you get to make your Puppet unique! You may need to ask for help with this part if you are not allowed to use a needle and thread.  If not, then gluing on works just as well.

I sewed on a yoyo and a button for a nose.
Picture
Picture
I cut out ears from different coloured felt. 

Picture
I folded the felt together and sewed the bottom sides together.

Picture
Then sewed the ears onto my sock.

Picture
Like this!

Picture
Now you have to decide if you want googly eyes or button eyes. I like the home made look of button eyes, and you can layer the buttons. If you have googly eyes feel free to use them.

Picture
​Ta Da!!!!

Picture
Now if you want to turn your puppet into a dragon or a dinosaur you will need some green felt and more thread. Cut a zig zag pattern down the middle of the felt and you will end up with two pieces ready to sew on.
Picture
Carefully sew the scales up the arm of the sock , make sure you are only sewing through one layer of sock not two.
Picture
Here is my finished puppet! His name is Hamish, he has a cousin called Nessie .(you may have heard of her) I hope you have fun making your own Sock puppets, and I look forward to seeing them all.

​Week Three April 20th - 24th.
Picture
   Water Colour Paint Recipe.
   Materials needed:  
                                    Baking soda
                                    Food colouring
                                     water
                                     ice-cube tray

     Method:  1. Begin by filling each of the slots of the ice-cube tray roughly 3/4 full with Baking soda.
                          2. Add 1-2 drops of food colouring to each slot, using different colours as you go.​
                          3. Then slowly begin to add water to each slot and gently mix. (a popsicle stick works well)
                          4. As you add water, the Baking soda will start to dissolve. Slowly add more Baking soda to      each slot and gently mix until you have a really thick consistency.
                          5. Now you can leave the trays of Water colour paints out to dry, or put them in the freezer    for faster results.
              Once the Water colour cakes are set, all you need is paper, water and brushes and you are  ready to start painting.


Picture
                                     Fun drawing ideas for a sunny day.

                            
If you've got some toy dinosaurs or other animals, a piece of paper to draw on, a pencil and a sunny day, then you have the makings of a fun Art project.
                         
                   (This works best outside on a sunny day, but you can still do it in doors with a lamp anytime too.)
                        First you need to see what direction the sun is shining.             Stand in the sun, look behind you, do you cast a shadow? If not, then move till you find an area where you do. If you do cast a shadow  then you can                                                                                 start this fun art lesson.
                             1. First, you place your piece of paper on a  flat surface in the sun.
                             2. Then,  you place your toy dinosaurs or other toy figures on the edge of the piece of paper. 
                             Make sure the sun is shining behind your toy. Now look at the page, does your toy leave a
                              shadow? If not, move it till it does.
                              3. Now, take your pencil and trace around the edge of your toys shadow on the paper. Once
                               you have traced all around, remove the toy and TA DA!! you have drawn a picture of your 
                                toy.  You can now colour it or add more animal shadows, have fun!


Picture
   A fun Earth Day activity you can try is:  STORY STONES  ( Painted or drawn on Rocks for story telling.)
         The next time you go out for a walk with your family, look for some small roundish shaped rocks that are
   not too big and fairly smooth. (Bring along a beach bucket or a small container to help you carry them in)
         Once you get them home, give them a wash to get any dirt off and then let them dry.  Now you can start
    painting your rocks. If you like, you can start by painting your stones all over with the same background colour, like white or yellow. This gives you a neutral background to paint on, and it also makes it easier to use felts to draw on ( if you are creating more detailed pictures)  For Story Stones, you then paint on pictures of different things that you would like to use to tell a story.
Picture
 For example, you could paint stones to retell the story of The Three Little Pigs.
    
   -one stone has the pot the wolf falls into
    -one stone has the fire
    -one stone the Wolf
    -one stone his huffing and puffing
    -three stones, one for each house, and
​    -three stones, one for each pig.

        These stones are now your illustrations. You can place them down in front of your audience as you are telling the story. 
   Now re-telling Fairy tales and nursery rhymes is fun, but you do not have to be limited to stories you already know!
​    Story Stones can be used to create your own stories!


Picture

     Maybe your family loves to go camping,
 - what a great idea to use to tell camp-fire stories!


Picture
  Maybe you love everything to do with 
Outer Space, well you could make story
​stones about our Solar System.

Picture
Is there construction going on near your 
​home? Why don't you try making story stones about Construction?

Picture
Or Pirates!

Picture
Maybe Mermaids?

Picture
Or Dinosaurs!

Picture
Remember Story Stones can  illustrate whatever you want to tell a story about. 
  Just let your imagination take flight, and think of all the stories you could create!


           HAVE FUN!

 Week #4:  April 27th - May 1st
Lets start with some other fun ideas you can do with Painted Rocks.
Picture
You can make your own Tic-Tac-Toe game.
   
        You will need 5 stones for each player,
         ( 10 stones total)
​         You can choose to paint the 
         background colours all the same,
         or different colours like this one.
         To put the X's and O's on you will
         need a dark colour like black, brown 
         or dark blue.
     
         For the playing board, you can draw
        4 criss- cross lines on any thing you               are allowed to use. You could even                  use chalk to draw them on the                         pavement or an outside patio.
         

Picture
 You may also choose to have just 2 
  background colours with white X's and
  O's, and a fine liner pen used to outline
​   the letters. (looks very affective)

Picture
You may even choose to go with a fun theme like STAR WARS!

​  R2D2 and Chewbacca look fun.

   What other themes can you think of 
    to Paint?    
                             Pokémon
                             Unicorns
                             Minecraft
                             Mermaids
                             Emoji's
                              

  There are many more amazing ideas you can create by painting on rocks, and I hope you will give one or more of them a try.
Picture
Picture
Picture
Picture
   Lets try some fun SPRING ART projects.

                             Salt Painting : is a raised 3D picture created with simple ingredients.
    For supplies you will need :- Heavier grade paper like card stock works great, it can be any colour but black
                                                             or dark blue give the best contrast.
                                                            - White glue.
                                                            - Salt (table salt works best)
                                                            - Water colour paint, or diluted food colouring.
Picture
  Step #1- Draw your design or picture with your glue. If you like you can lightly draw your design out first with a pencil.
Picture
  Step #2 - After you have put glue all along the outline of your picture, before it dries you need to sprinkle salt 
  all over the glue till every part is covered.
  Step#3 - Once the whole picture is covered then tip the picture sideways to get the extra salt to fall off.  I            suggest doing this step over a tray so you can catch the excess salt.
Picture
Picture
  Now you have to let the picture dry completely before you go on.
  Once the glue has dried you can start Step #4- Take a paint brush, get it wet with liquid water colour paint (or
  food colouring with a few drops of water added) and begin painting over the salt covered glue. 
    Like magic, the colour will transfer from the brush to the salt.
Picture
  Just think of all the things you can create with salt painting. 
Picture
Picture
Picture
Picture
 These would be fun to put up on your windows.

Picture

             NEW PROJECT:                                                                                Lets make our own FAIRY HOUSE and Garden!
      Now this project can be created all by yourself, or
      with a little help from a grown up or older sibling, it
      will depend on if you choose to make this with white 
       glue, or a glue gun (which will make it easier and dry 
      faster, but you'll need a grown up help you with that)
      

​

Picture
  You will need to gather some supplies for this project. 
          - first of all you will need a small to medium size plastic container (not too deep)
          - a small cardboard box. (like a tissue box, or the bottom half of a milk carton, or a Timbits box)
          - craft/popsicle sticks. (These can be used to cover the Fairy House, but if you like instead you can use 
            little  sticks and twigs and moss you find outside)
          - colourful buttons.
          - colourful glass stones.
          - glue/glue gun.
          - don't forget Glitter (or Pixie Dust)
          - and any other little odds and ends you might find around the house that you can fashion into 
             different things that might attract Fairies to your garden.


Picture


 These are some things you could gather
from outside to cover your Fairy House.
   - twigs, moss, bark from a tree, acorns,
pine cones, dried leaves, and small stones.


 Take the plastic container and fill it with dirt, not too full just about half way up the container.
Picture
 Now take your colored glass stones and lay them out to make a stone pathway around your Fairy Garden.
Picture
  Next, take an old tissue box, bottom of a small cardboard box, or a Timbits box and cut it down to make it fit inside your plastic container.
Picture
 Now you can either glue on with white glue or, with parent supervision hot glue the craft sticks or twigs onto
 your cardboard box.
Picture
 Once the craft sticks or twigs are glued on you can start to decorate your Fairy House with colourful buttons.
Picture
 Now put the dried and decorated Fairy House into the Fairy Garden and begin adding little accessories.
Picture
 You can begin by adding moss to the front and inside the house so the Fairies have a soft comfortable carpet and garden area.
 You can also transplant a small plant or flower as the container has dirt in it and it can become a living indoor garden that with a little bit of watering should last well.
  Most importantly, don't forget to sprinkle Pixie dust
​ around so the Fairies will feel at home!
Picture
 What an amazing Garden, I'm sure the Fairies will love it. If you would like to make something extra for the garden try these.
 To make button chairs, take a flat stone, glue a large
button on, glue a smaller one on the inside and another large one on the back.
 For the welcome sign, write Fairies Welcome on a piece of paper, cut it out, cover with clear tape (so it will last longer) trim the edges and glue to a twig.
Picture
Picture


 How about a tire swing (all Fairies love to 
 swing)? All you need is a small branch, a piece of string, and the tire off of an old toy
​truck.

Picture


​                       This Fairy size campfire was made by taking a small candle with an  
                 artificial flame, and gluing pebbles and twigs around it to hide the white
                 plastic part.
​                                           Looks very effective!

Picture


  And finally, if you are feeling very creative, you can try making some Fairy size bunkbeds out of sticks and moss.


   I am sure that whatever you choose to make will be most appreciated by the Fairies! Have fun creating.

 I hope you have had some fun creating your very own Fairy garden, with twigs and leaves and other things you can find in Nature.
​ While walking around the forests and trails we can find many beautiful and interesting things. I know I like to collect unusual pebbles I find at the beach, some people collect leaves, or wild flowers or just love to watch all the interesting things in Nature and draw pictures of them. Now a fun way to keep track of all your found treasures and pictures could be in a Paper Bag Book!
Picture


This Paper Bag Book is about Summer.
 Your Paper Bag Book can be about anything you want, such as …….
                    - My Nature walks.
                    - Animals I have seen in the 
                        woods.
                    - Spring flowers I love.
                    - My Leaf collection.
                     - My Drawings of Nature.
​  


 Supplies you will need include.....
                - 4 brown lunch bags (or you can make this quite large by using 2 or 3 full size grocery bags)
                - colourful twine or wool.
                - sheets of white paper.
                - double sided tape or glue.
                - a hole puncher, and or scissors.
                - measuring tape.
​                - crayons.
                   
Picture
 Step #1: Lie your paper bags on top of each other all facing the same way, with the fold on the back.
Picture
Step#2: Fold bags in half together, and use your hole puncher to punch 3 holes, so when you open the bags they look like this. 
Picture
Step#3:​​Tie a piece of coloured twine or wool in each hole and trim to about 1inch.
Picture
Step#4: cut 5 pieces of white paper to fit your paper bags. Glue these onto each side of the bag pages. These are where you can add pictures or  titles of what you have found.
Picture
 Now you can create your own story on these pages and save pictures you draw and treasures you want to keep in the pockets.
Picture
Picture
Picture
Powered by Create your own unique website with customizable templates.